elchikaのハードウェア作品投稿キャンペーンでM5Stack他をもらいました
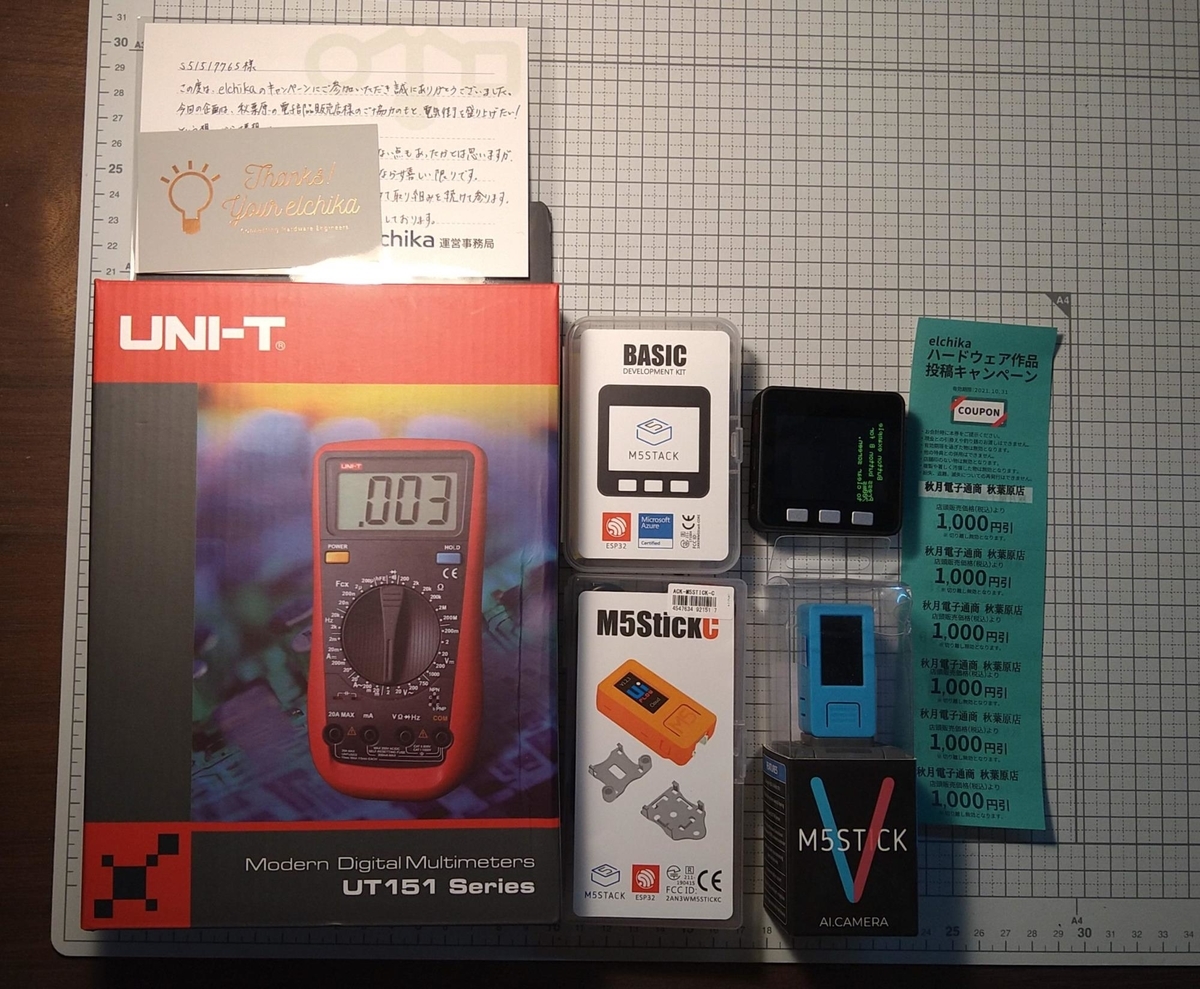
M5Stackを使ってみたいな、と思っていたので真っ先にこれを選択。あとはちょっといいテスターが欲しかったのでデジタルマルチメーターと、何にでも使えそうな秋月電子の商品券にしました。
早速M5Stackに入門
raspberrypi.mongonta.com
セットアップはこちらを参考にしました。
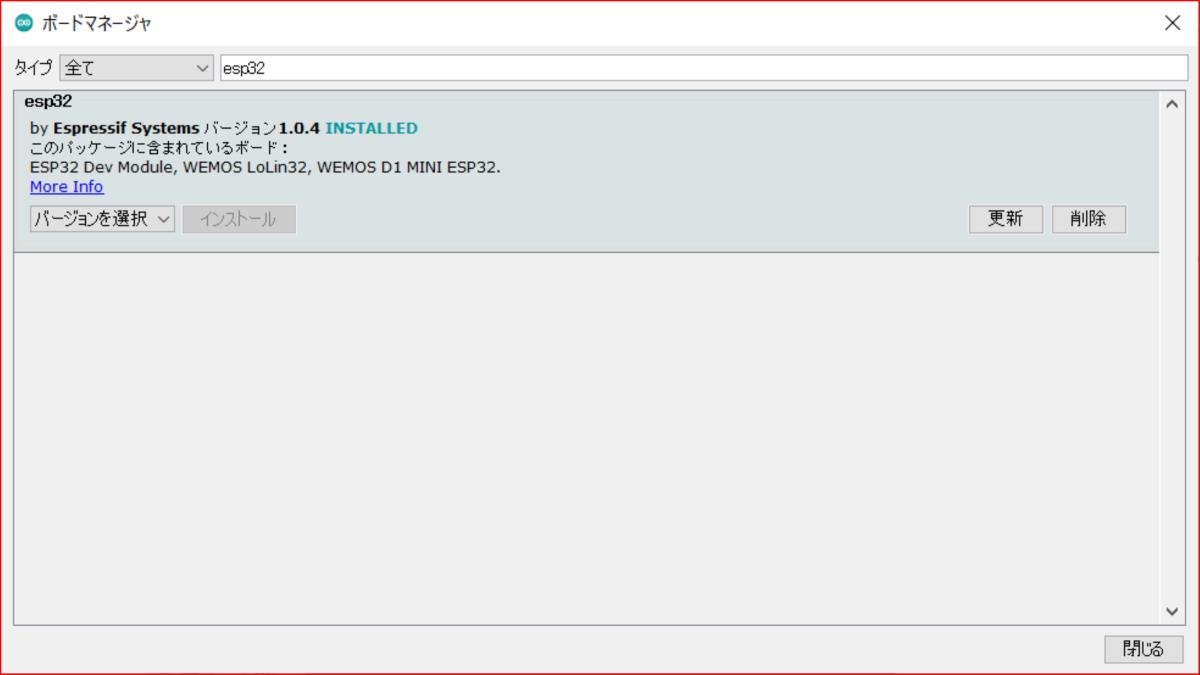
ESP32はセットアップ済みなのでボード情報はインストール済みで、デバイスドライバ(CP210X Driver)のインストールとライブラリの追加でOKでした。
・デバイスドライバのインストール
shop.m5stack.com
・ボード情報のインストール
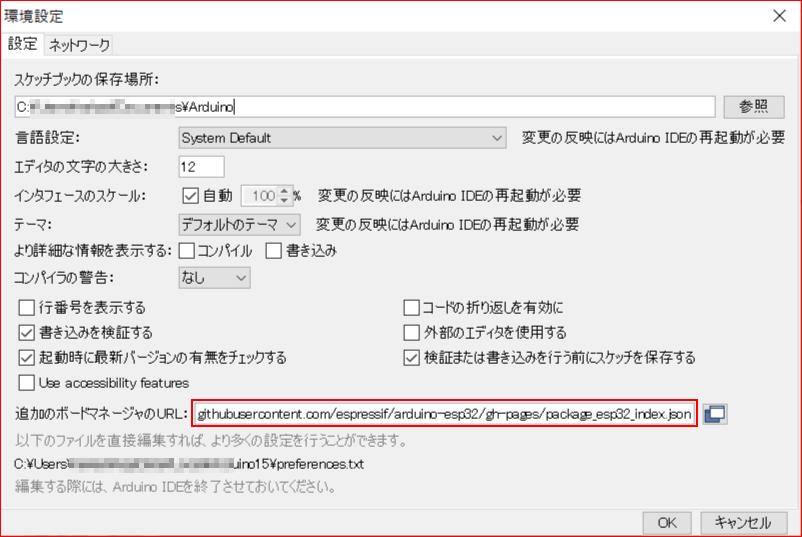
・M5Stackののライブラリのインストール
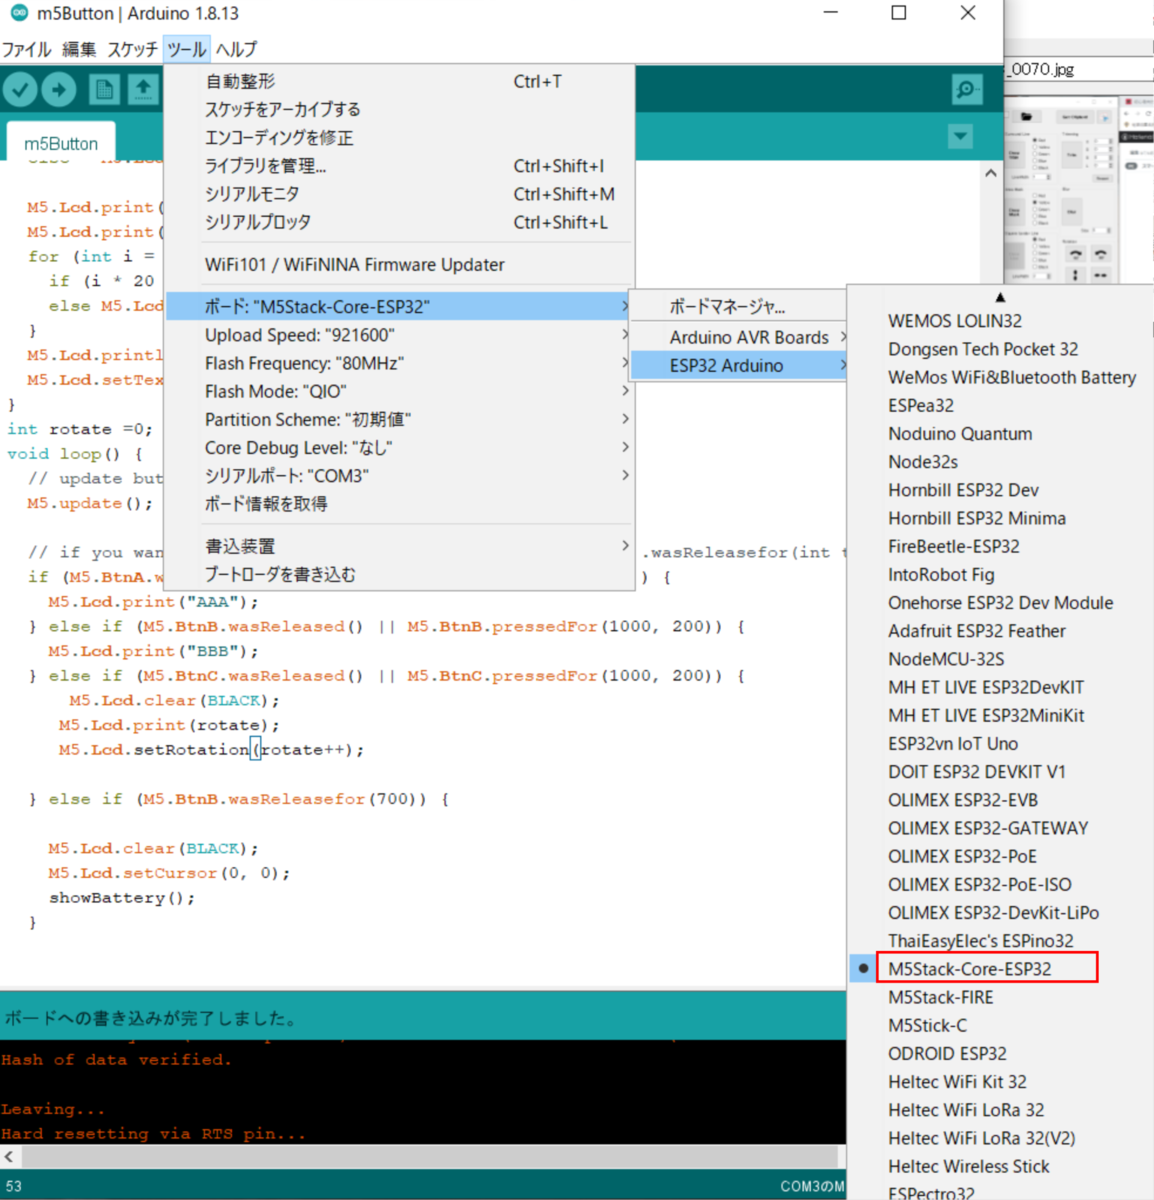
あとは、ボードとしてESP32 Arduino ¥ M5Stack-CoreoESP32を選択します。
動かしてみる
Buttonのサンプルコードにちょっと手を加えたものですが、コンパイルから動くところまでやってみました。
elchikaのハードウェア作品投稿のプレゼントでM5stackに入門しました。
— とりてん (@s51517765) 2021年4月24日
コンパイルが結構時間かかるなぁ、とおもって測ってみると書き込み完了まで1分ぐらい。
初回はもっと時間かかっていた気がするが、IDEかドライバの初期化とかしているのだろうか? pic.twitter.com/jIvcaWejAs
ESP32系?はArduinoよりかなり時間がかかりますね。
ボタンの読み取り、画面の回転、バッテリーレベルの表示、文字サイズの変更が出来た。画面の初期値は90°回転した状態になっているらしい。#M5Stack pic.twitter.com/rZjnFh0FxU
— とりてん (@s51517765) 2021年4月24日
まとめ
M5Stackはボタンとディスプレイがついていていいですね。
それにしてもelchikaさん太っ腹。
つぎはobnizのコンテストが開催されています(こちらはパス)。
elchika.com
#include <M5Stack.h>
// The setup() function runs once each time the micro-controller starts
void setup() {
  // init lcd, serial, but don't init sd card
  M5.begin(true, false, true);

  /*
    Power chip connected to gpio21, gpio22, I2C device
    Set battery charging voltage and current
    If used battery, please call this function in your project
  */
  M5.Power.begin();
  M5.Lcd.clear(BLACK);
  M5.Lcd.setTextColor(YELLOW);
  M5.Lcd.setTextSize(3);
  M5.Lcd.setCursor(65, 10);
  M5.Lcd.println("Button example");
  M5.Lcd.setCursor(3, 35);
  M5.Lcd.println("Press button B for 700ms");
  M5.Lcd.println("to clear screen.");
  M5.Lcd.setTextColor(RED);
}

void showBattery() {
  int BatteryLv = M5.Power.getBatteryLevel();

  if (BatteryLv < 40)  M5.Lcd.setTextColor(RED);
  else   M5.Lcd.setTextColor(GREEN);
  M5.Lcd.setTextSize(3);
  M5.Lcd.print(BatteryLv);
  M5.Lcd.print("[");
  for (int i = 0; i < 5; i++) {
    if (i * 20 < BatteryLv) M5.Lcd.print("#");
    else M5.Lcd.print(" ");
  }
  M5.Lcd.println("]");
  M5.Lcd.setTextColor(YELLOW);
  M5.Lcd.setTextSize(5);
}
int rotate = 0;
void loop() {
  // update button state
  M5.update();

  // if you want to use Releasefor("was released for"), use .wasReleasefor(int time) below
  if (M5.BtnA.wasReleased() || M5.BtnA.pressedFor(1000, 200)) {
    M5.Lcd.print("AAA");
  } else if (M5.BtnB.wasReleased() || M5.BtnB.pressedFor(1000, 200)) {
    M5.Lcd.print("BBB");
  } else if (M5.BtnC.wasReleased() || M5.BtnC.pressedFor(1000, 200)) {
    M5.Lcd.clear(BLACK);
    //  M5.Lcd.print(rotate);
    M5.Lcd.print("EEE");
    M5.Lcd.setRotation(rotate++);
    if (rotate > 3)rotate = 0;

  } else if (M5.BtnB.wasReleasefor(700)) {
    M5.Lcd.clear(BLACK);
    M5.Lcd.setCursor(0, 0);
    showBattery();
  }
}

- メディア: おもちゃ&ホビー